AWS IAM (Identity Access Management) allows you to create the new users , groups and delegates the roles to users and groups using policy documents. AWS policy documents are written in simple JSON (JavaScript Object Notation) language and it’s easy to understand. The policies are readily available and we are not expected to write JSON (JavaScript Object Notation) scripts. This article will walk you through creating the new users account , groups and attaching polcies to groups. It will also demonstrates that how to attach the policies to the individual users and groups. In the IAM setup part, the following actions needs to be completed to enable all 5 security features to the AWS account.
- Delegate your root access keys (It will be marked as green as part of account setup)
- Activate MFA on your root account (Completed – Refer part 4 )
- Create individual IAM users (Part 5 )
- Users group to assign permissions (Part 5 )
- Apply an IAM policy (Part 5 )
Let’s begin the AWS LAB.
1. Login to AWS console and Navigate to IAM from security & identity tab. (Refer Part 4)
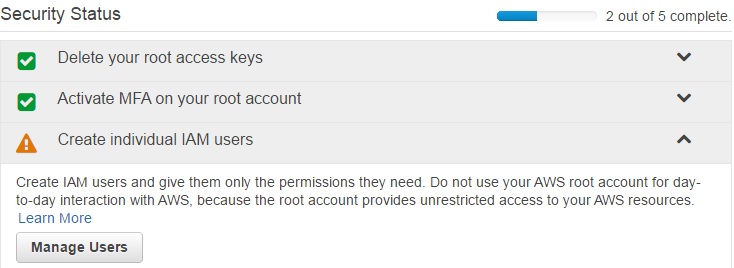
Click on Manage users.
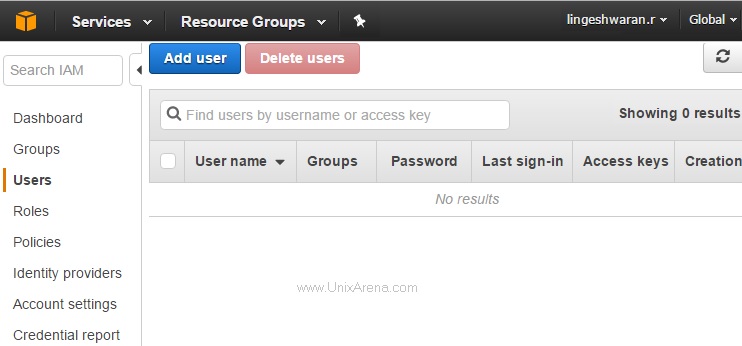
2.Click on Add user tab.
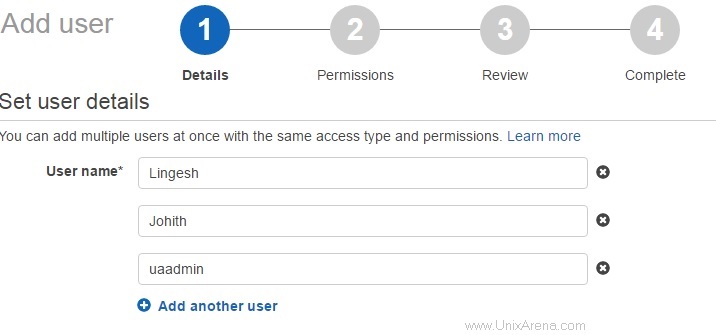
3. Enter the user name . Click on “Add another user” link to add multiple users at same time.
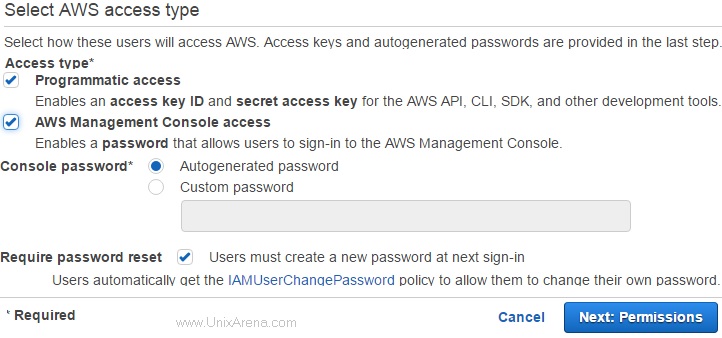
4. Select the access type for users. You have option to auto-generate the account password and force to change at first login.
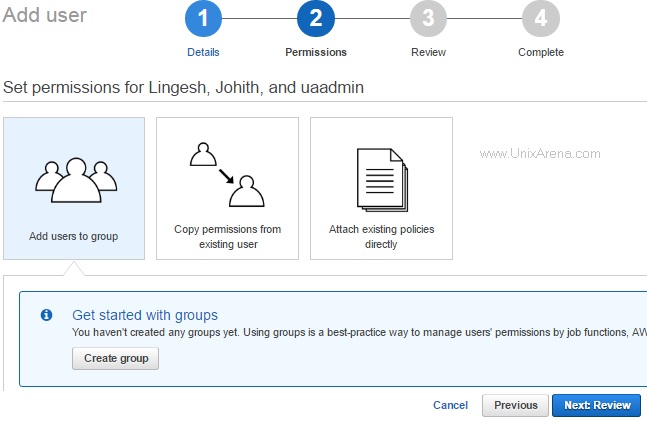
5. We shall create the group later. Just click on “Next” to review the accounts.
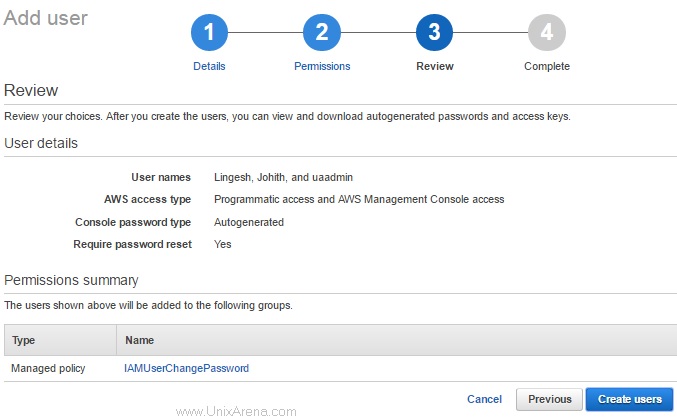
6. Review the accounts and click “Create Users” to create the account.
7.Download the CSV file which contains the user secret access keys and passwords. There is no way to fetch those keys and passwords once you close the wizard. You might need to re-generate it from root account if you lost the credentials.
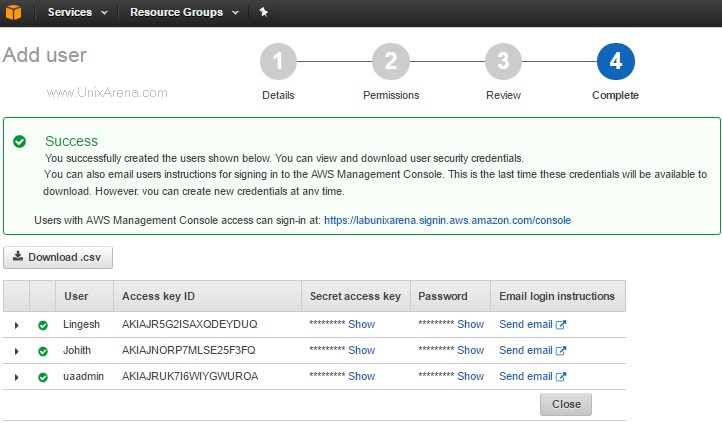
8.Here is the list of users which we have created.

We have successfully created users on AWS IAM.
9. Let’s begin to mange the groups.
10.Click on Create New group tab .

11. Enter the group name.

12.We will attach the policies later if required.
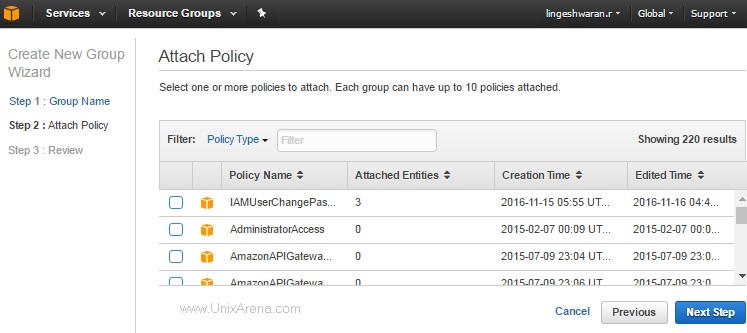
13. Review and create the group.

14. Here is the newly created group.

We have successfully created new group on AWS IAM.
Adding users to GROUP:
Let’s add the newly created users to group UASUPPORT.
1. Select the group and click on group action. Select “Add users to group”.

2. Select users which are need to be part of “UASUPPORT” group and click on “Add users”
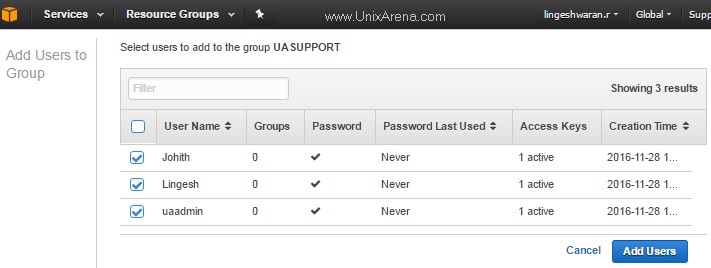
3. Here you can see that all three users are added to the group.

Attach polices to group:
Attaching policies to group is best practice instead of directly attaching to individual users. That’s the reason we have skipped attaching the policy while creating the users. Let’s see how we can attach the administrator policy to group UASUPPORT.
1.Click on Policies. Search for “AdminstratorAccess” policy and select it. From the “Policy Actions” menu , click on Attach .
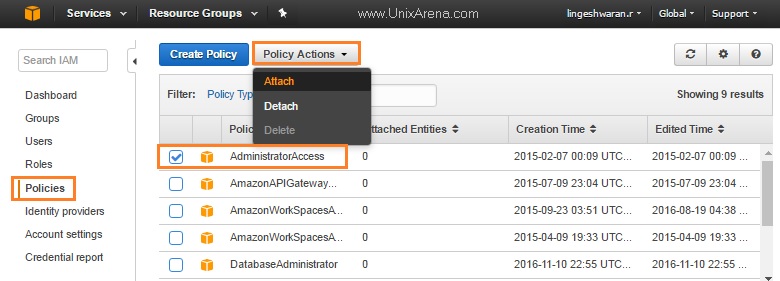
2.Select group and click on “Attach policy”.
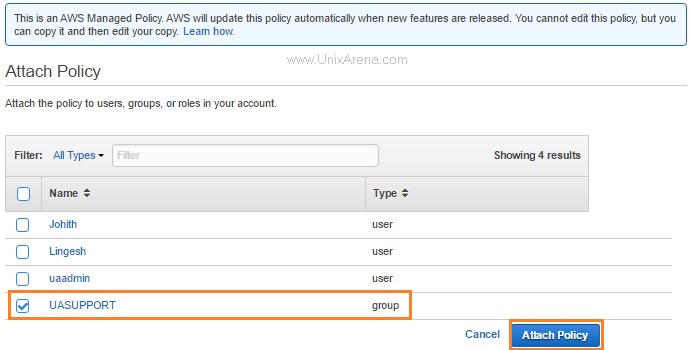
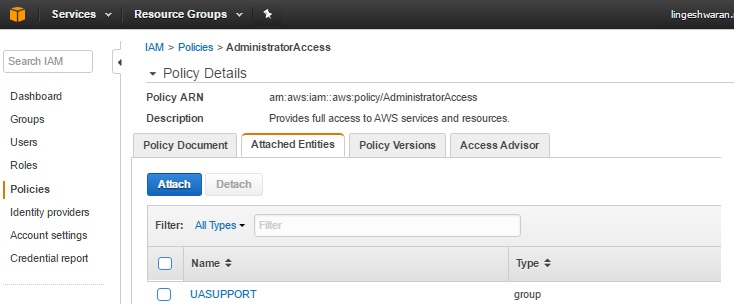
3.Here you can see that group “UASUPPORT” has been successfully attached policy “Administrator Access” . Now all the users under that group will equivalent to root users.

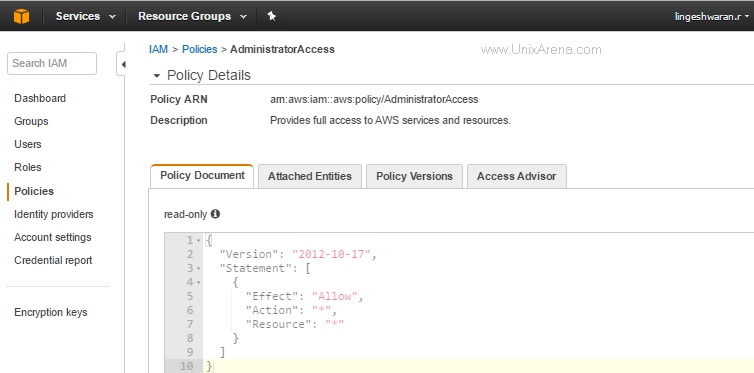
Let’s have a closer look on policy documents.
1.Click on the policy name (AdministratorAccess).
2. Just click on Attached Entities to see where these policy is used.
Apply IAM Password Policy:
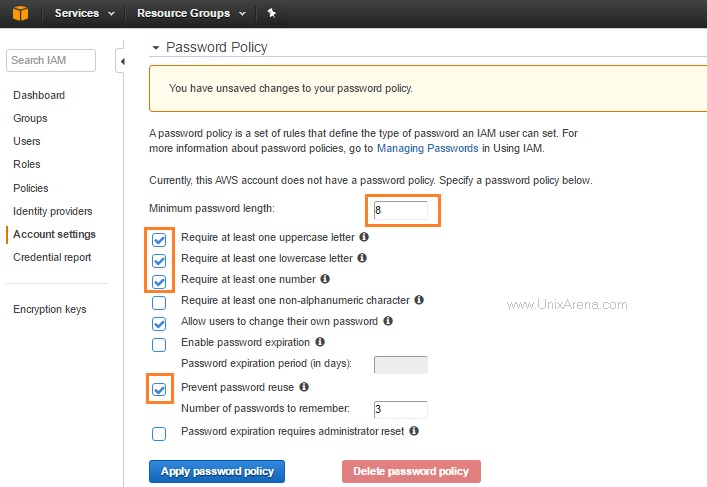
Let’s configure the password policy.
Click on Manage password policy which will take you to the below screen. You can configure according to your requirement. I have highlighted my changes in the password policy.
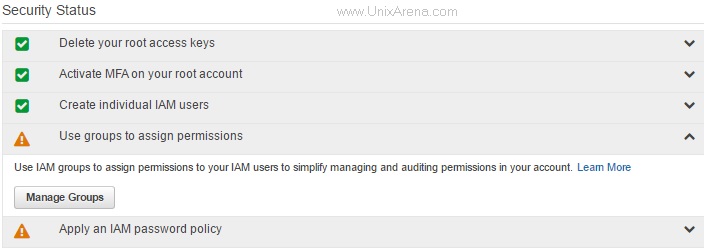
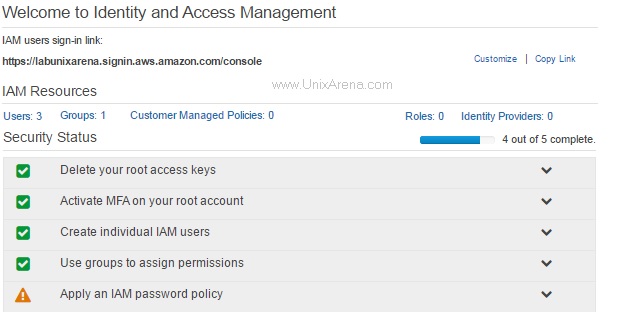
Just go back to IAM dashboard and look at the security status. You should see something like below.
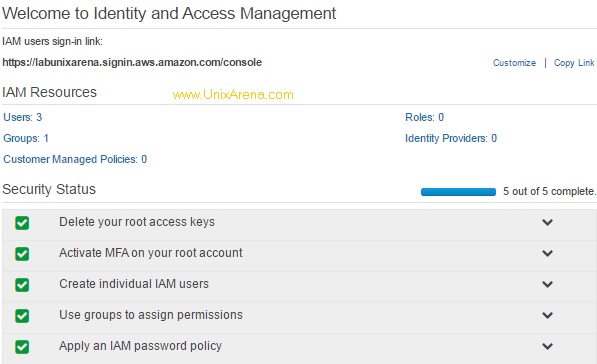
We have successfully setup AWS IAM . You could test the user login credentials using direct URL which we have customized earlier . In the upcoming article, we will dig in to S3 (AWS Storage servcie).
Leave a Reply