How to integrate Terraform IaC (Infrastructure as Code) into Jenkins? Cloud infrastructure offers great agility and flexibility but you need the right toolsets to manage the power of public cloud platforms. To operate in the public cloud efficiently, You need to treat infrastructure as code (IaC). IaC eliminates the manual interaction required to configure Cloud and On-PREM resources. It gives you access to automated tools that you can manage the same way you manage the configuration files. IaC code can be developed, test, deploy, and manage those configurations using source control.
Terraform is one of the most popular IaC tools in the market. In most organizations, Jenkins is primarily used as a CI/CD tool for the software development lifecycle to build and test your products continuously.
To bring governance on terraform CLI, you need tools like Jenkins. Jenkins and Terraform integrations bring a lot more value than paid tools or cloud native toolsets. This integration can be easily scaled for an enterprise as well.
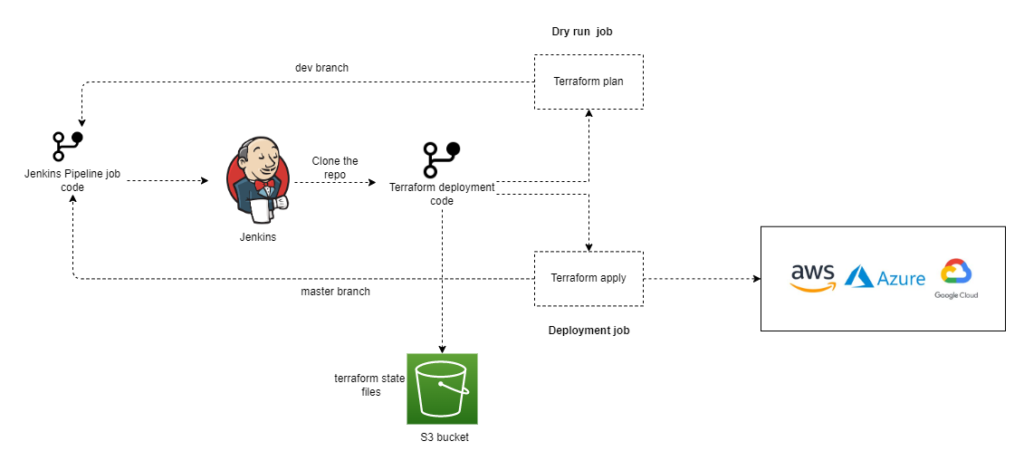
Pre-requisite:
- EC2 instance with Jenkins installed and configured
- Sample terraform code on git repository
Configure Terraform Plugin on Jenkins:
1. Login to the Jenkins console as an admin user and navigate to the “Manage Jenkins” section.
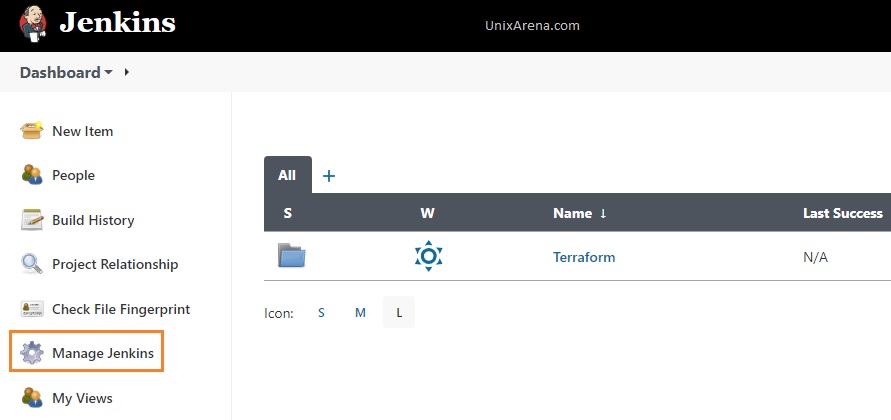
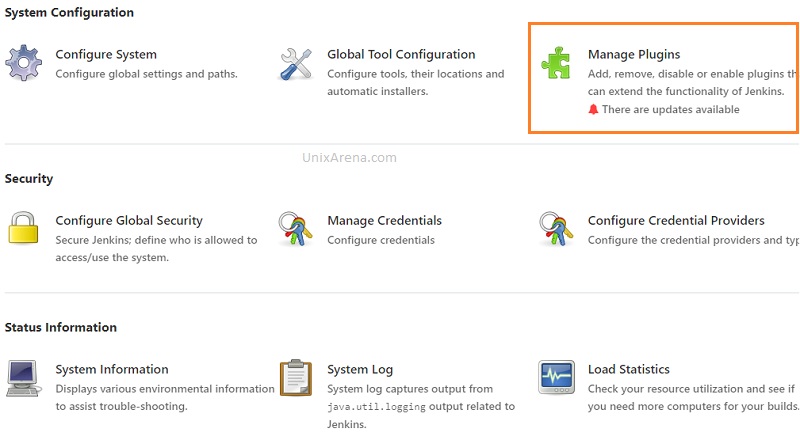
2. Click on “Manage Plugins”.
3. Search for the “terraform” plugin. Select the plugin and click on “Install without restart”
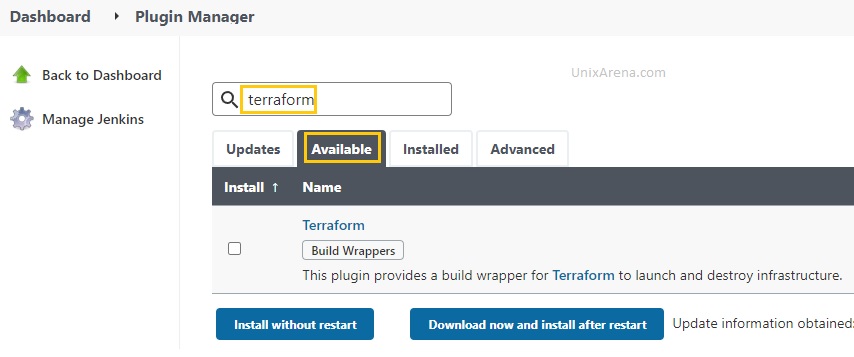
4. Install the “terraform” plugin.
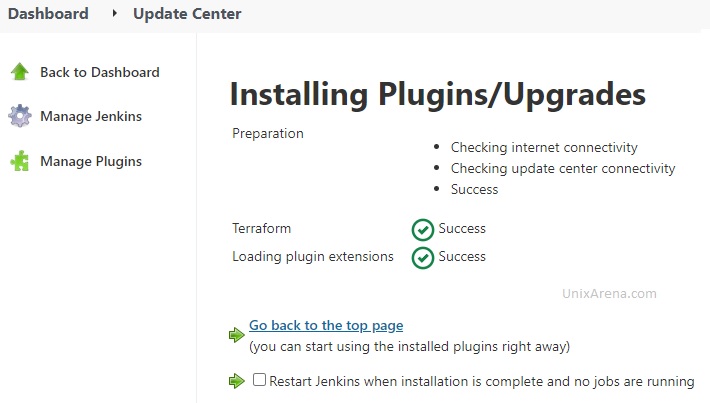
5. Click on “Global Tool Configuration” to configure terraform.
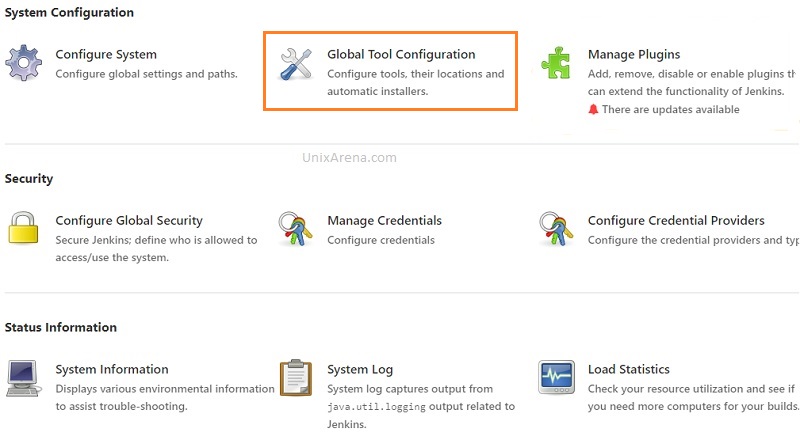
6. Enter the terraform binary path. If you don’t have terraform CLI on the Jenkins node, download it and place it under “/usr/local/bin”
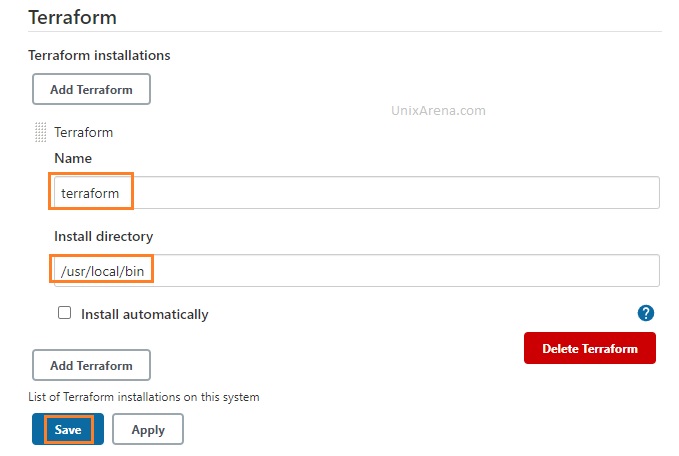
Terraform plugin configuration
Jenkins Plugins:
Ensure that you have the following plugins installed on Jenkins.
- Stage Step Pipeline
- SCM Step Pipeline
- Multibranch Pipeline
- Input Step Pipeline
- Declarative Pipeline
- Basic Steps Pipeline
- Build Step Pipeline
- Terraform Plugin
- Workspace Cleanup
- Plain Credentials
- Credentials Binding
- Build Timeout
- AnsiColor
GitHub Repository
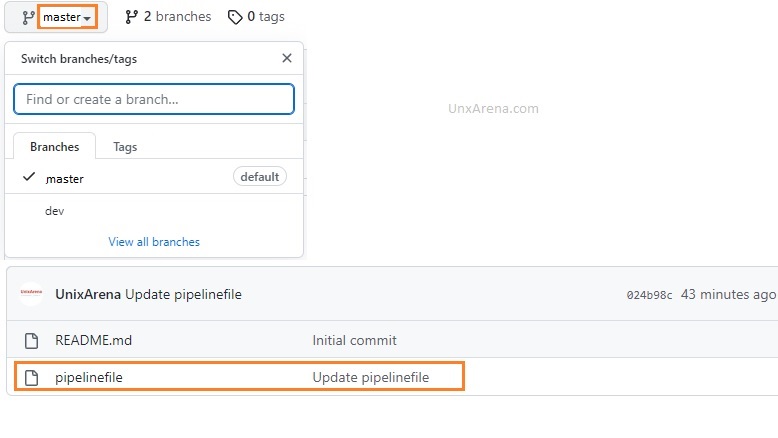
Here is the Github repository link to fork. I have created two branches with a few changes for safer terraform deployment.
https://github.com/UnixArena/jenkins-terraform
Creating First Jenkins Pipeline Job for Terraform
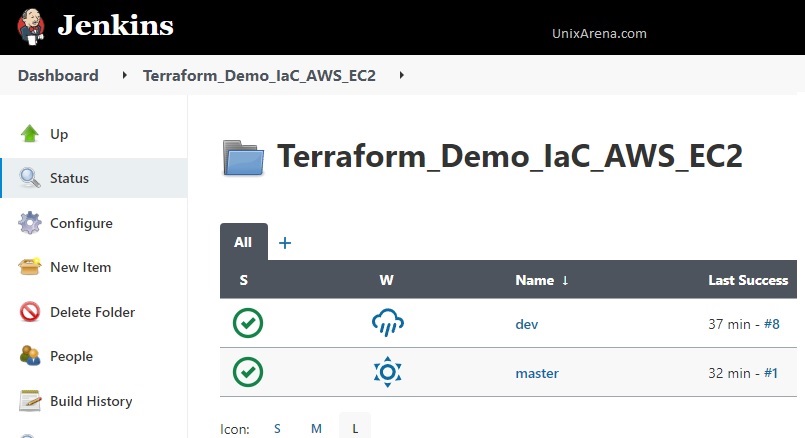
1. Let’s assume that you would like to provision an AWS EC2 instance using terraform. Create a new directory on the Jenkins called “Terraform_Demo_IaC_AWS_EC2“. Under this directory, Create a first pipeline job called “dev”.
- dev – development (used for dry run – ex: terraform plan)
- master – actual implementation. (ex: terraform apply)
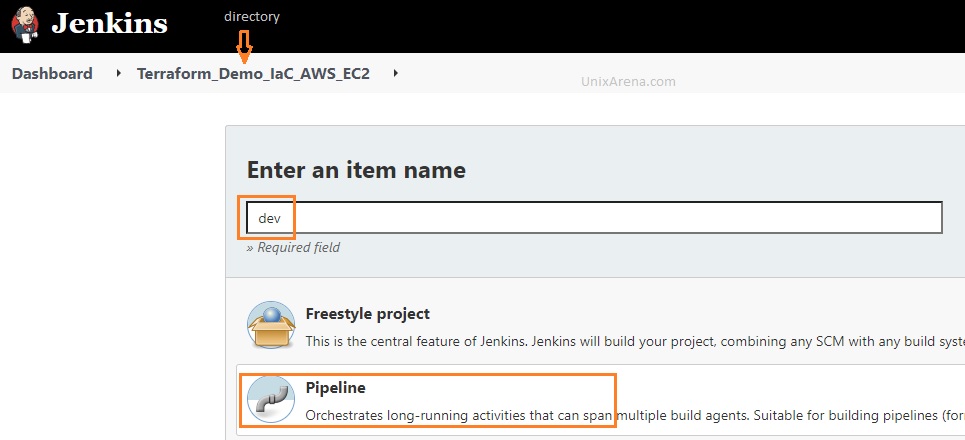
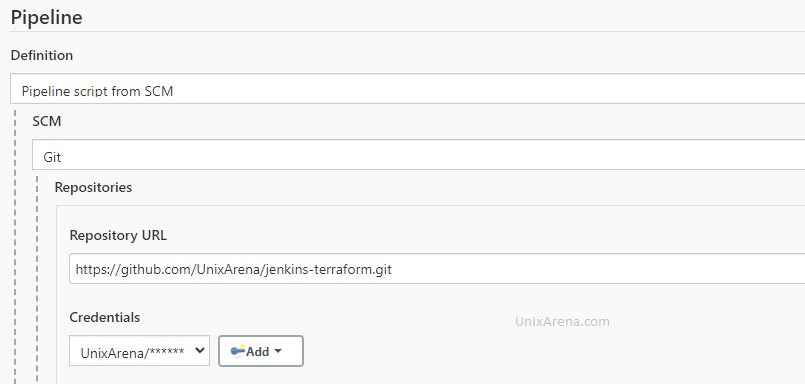
2. Specify the git repository link where the pipeline script will be placed. If it’s a public repository, no need to pass the credentials.
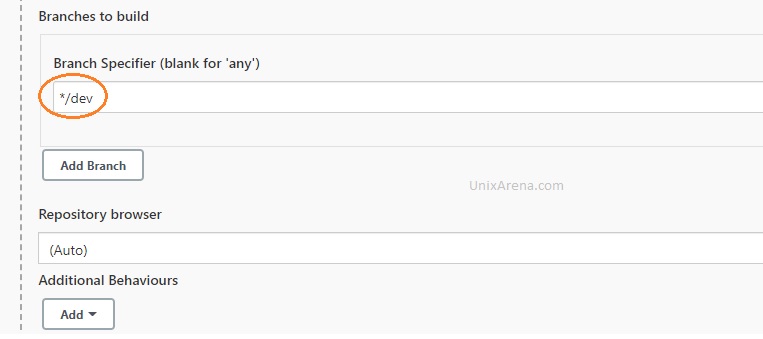
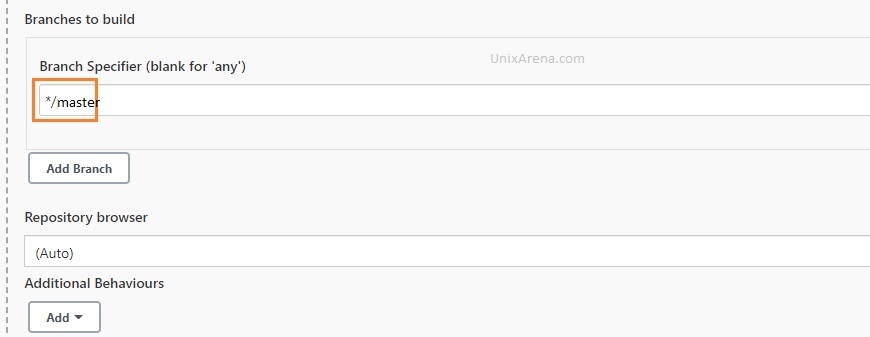
3. Specify the branch name as “dev“. We will come back to the GitHub repository branch strategy later.
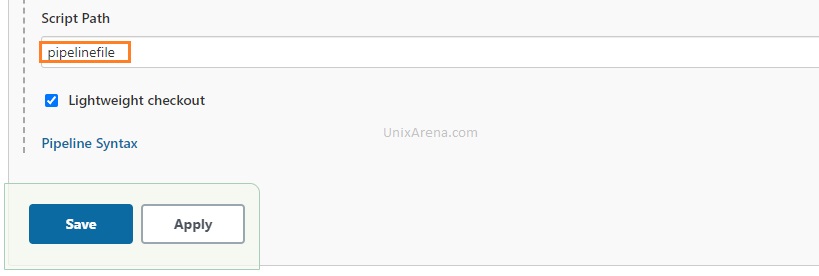
4. Update the actual pipeline file name with the path and save the job.
5. Let’s clone this job to the master the job. Click on the new Item and enter the job name as “master“.
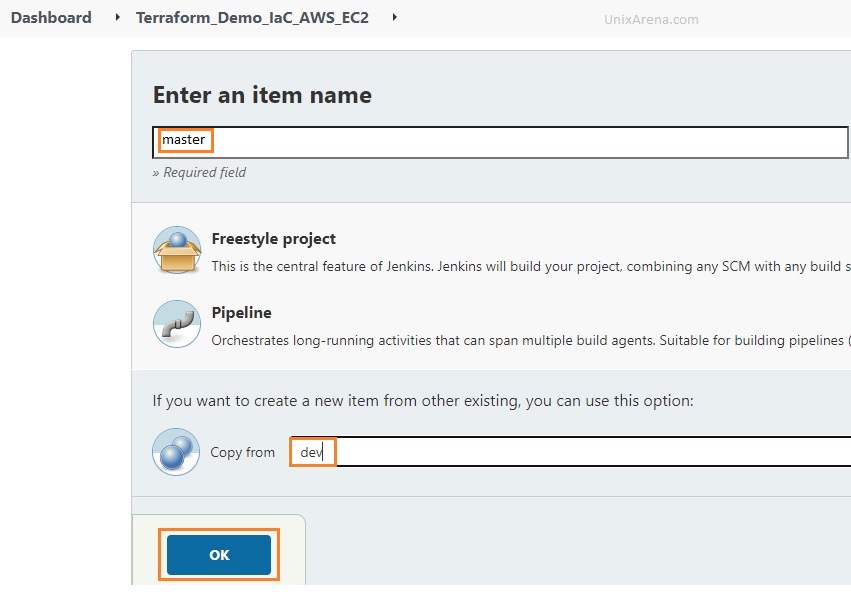
6. Update the branch details for the master job.
7. Our Jenkins jobs are ready.
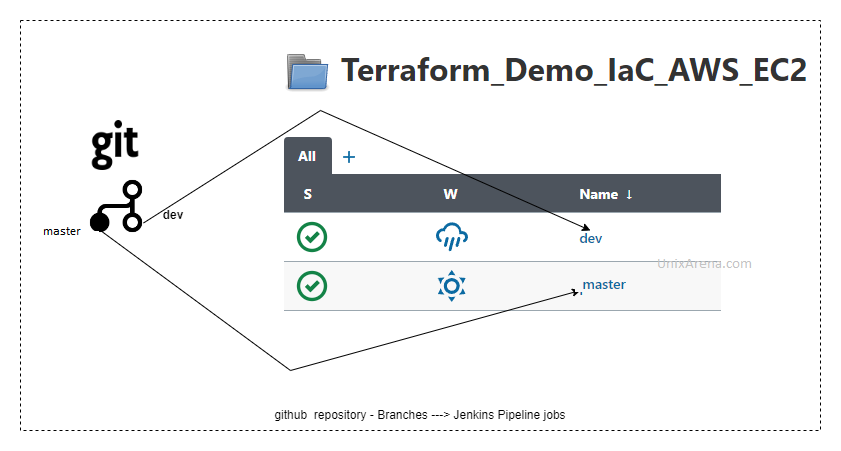
GitHub repo branches – > Jenkins job
The repository branches have been mapped to the Jenkins job.
AWS Authentication:
You need to configure the IAM role for a service with administrative privileges. Attach the role to the Jenkins instance if the Jenkins instance running on AWS. Otherwise, you need to store the AWS access & secret key in Jenkins credentials and export it as an environment variable.
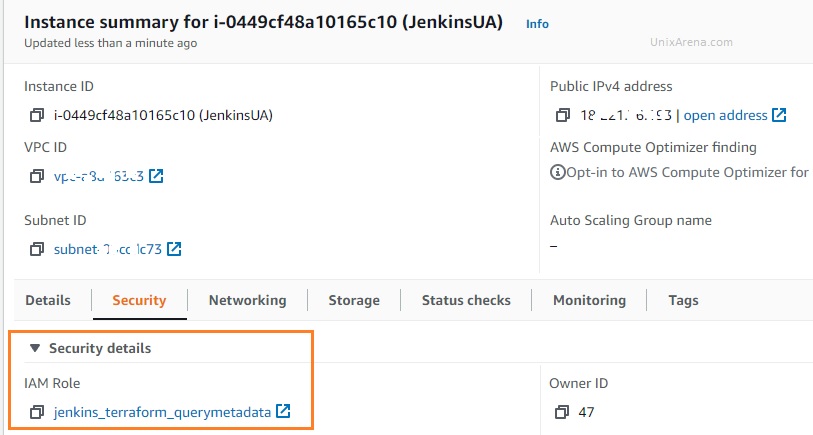
Test our work
The pipeline job has been coded to deploy a new EC2 instance on the AWS us-east2 region. This pipeline job calls the repository “https://github.com/UnixArena/terraform-test” for the deployment.
1. Login to the Jenkins console and navigate to the jobs. Click “dev” and click on “Build Now”.
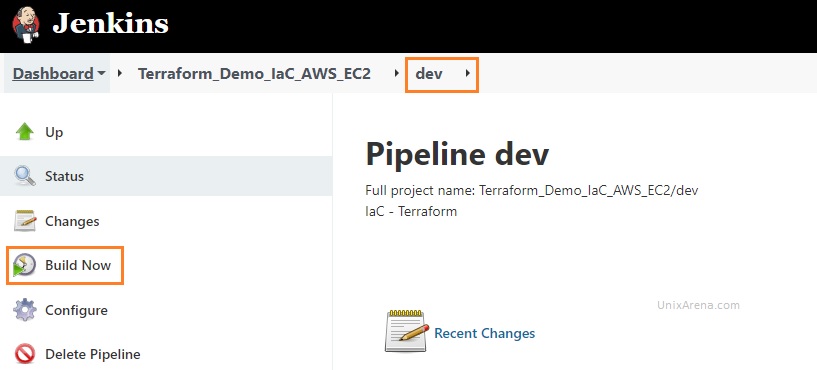
We can see that the “dev” job has been successfully completed. This job is just a dry run for the implementation.
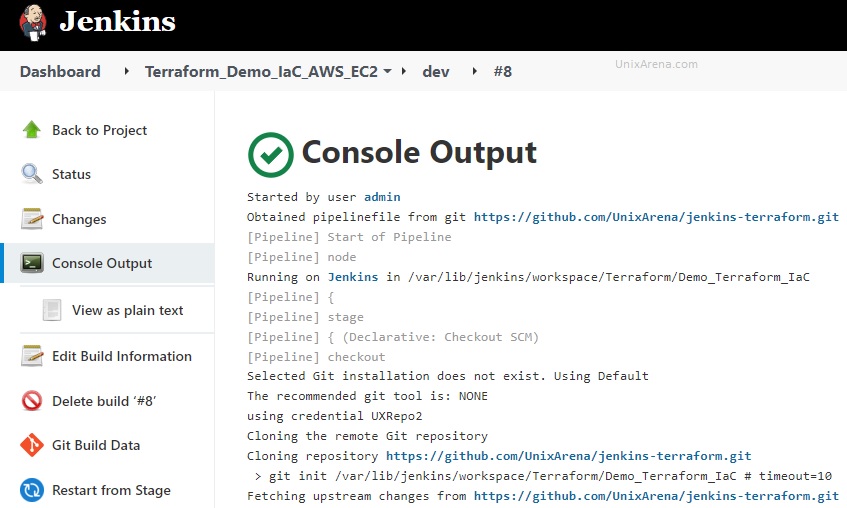
Here is the terraform plan output.
+ cd terraform-test/
+ terraform plan -out=tfplan.out
Refreshing Terraform state in-memory prior to plan...
The refreshed state will be used to calculate this plan, but will not be
persisted to local or remote state storage.


------------------------------------------------------------------------

An execution plan has been generated and is shown below.
Resource actions are indicated with the following symbols:
  + create

Terraform will perform the following actions:

  # aws_instance.main will be created
  + resource "aws_instance" "main" {
      + ami                          = "ami-001089eb624938d9f"
      + arn                          = (known after apply)
      + associate_public_ip_address  = (known after apply)
      + availability_zone            = (known after apply)
      + cpu_core_count               = (known after apply)
      + cpu_threads_per_core         = (known after apply)
      + get_password_data            = false
      + host_id                      = (known after apply)
      + id                           = (known after apply)
      + instance_state               = (known after apply)
      + instance_type                = "t2.micro"
      + ipv6_address_count           = (known after apply)
      + ipv6_addresses               = (known after apply)
      + key_name                     = (known after apply)
      + outpost_arn                  = (known after apply)
      + password_data                = (known after apply)
      + placement_group              = (known after apply)
      + primary_network_interface_id = (known after apply)
      + private_dns                  = (known after apply)
      + private_ip                   = (known after apply)
      + public_dns                   = (known after apply)
      + public_ip                    = (known after apply)
      + secondary_private_ips        = (known after apply)
      + security_groups              = (known after apply)
      + source_dest_check            = true
      + subnet_id                    = (known after apply)
      + tags                         = {
          + "Env"  = "dev"
          + "Name" = "IaC-Test"
        }
      + tenancy                      = (known after apply)
      + vpc_security_group_ids       = (known after apply)

      + ebs_block_device {
          + delete_on_termination = (known after apply)
          + device_name           = (known after apply)
          + encrypted             = (known after apply)
          + iops                  = (known after apply)
          + kms_key_id            = (known after apply)
          + snapshot_id           = (known after apply)
          + tags                  = (known after apply)
          + throughput            = (known after apply)
          + volume_id             = (known after apply)
          + volume_size           = (known after apply)
          + volume_type           = (known after apply)
        }

      + enclave_options {
          + enabled = (known after apply)
        }

      + ephemeral_block_device {
          + device_name  = (known after apply)
          + no_device    = (known after apply)
          + virtual_name = (known after apply)
        }

      + metadata_options {
          + http_endpoint               = (known after apply)
          + http_put_response_hop_limit = (known after apply)
          + http_tokens                 = (known after apply)
        }

      + network_interface {
          + delete_on_termination = (known after apply)
          + device_index          = (known after apply)
          + network_interface_id  = (known after apply)
        }

      + root_block_device {
          + delete_on_termination = (known after apply)
          + device_name           = (known after apply)
          + encrypted             = (known after apply)
          + iops                  = (known after apply)
          + kms_key_id            = (known after apply)
          + tags                  = (known after apply)
          + throughput            = (known after apply)
          + volume_id             = (known after apply)
          + volume_size           = (known after apply)
          + volume_type           = (known after apply)
        }
    }

Plan: 1 to add, 0 to change, 0 to destroy.

------------------------------------------------------------------------

This plan was saved to: tfplan.out
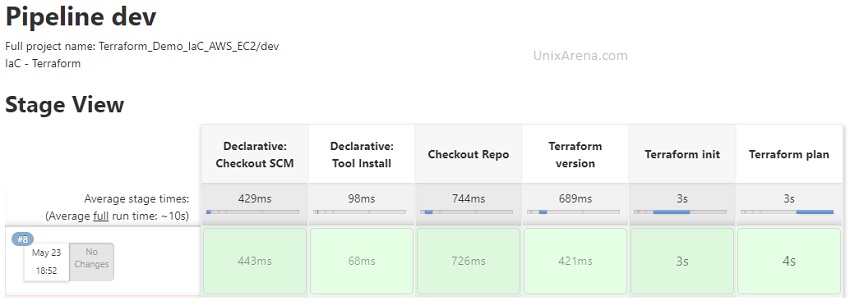
2. Review the plan twice before kicking the master job for the actual implementation. In my case, let me trigger the “master” job for the actual implementation.
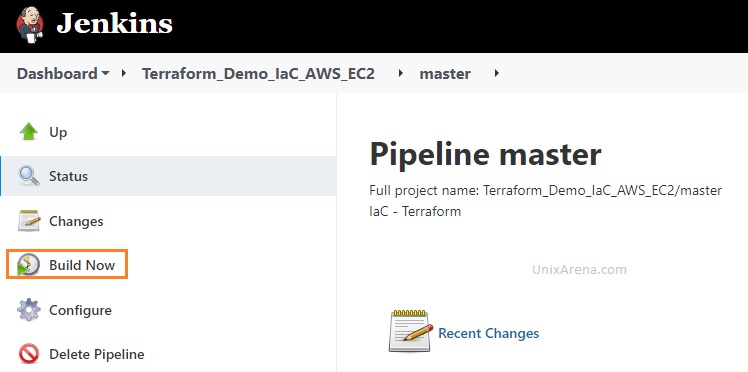
3. Here is the successful pipeline job result.
[Pipeline] stage
[Pipeline] { (Terraform apply)
[Pipeline] tool
[Pipeline] envVarsForTool
[Pipeline] withEnv
[Pipeline] {
[Pipeline] sh
+ cd terraform-test/
+ terraform apply --auto-approve
aws_instance.main: Creating...
aws_instance.main: Still creating... [10s elapsed]
aws_instance.main: Still creating... [20s elapsed]
aws_instance.main: Still creating... [30s elapsed]
aws_instance.main: Creation complete after 31s [id=i-0d5d5e6953eab6884]

Apply complete! Resources: 1 added, 0 changed, 0 destroyed.
Post stage
[Pipeline] cleanWs
[WS-CLEANUP] Deleting project workspace...
[WS-CLEANUP] Deferred wipeout is used...
[WS-CLEANUP] done
[Pipeline] }
[Pipeline] // withEnv
[Pipeline] }
[Pipeline] // stage
[Pipeline] }
[Pipeline] // withEnv
[Pipeline] }

[Pipeline] // ansiColor
[Pipeline] }
[Pipeline] // withEnv
[Pipeline] }
[Pipeline] // node
[Pipeline] End of Pipeline
Finished: SUCCESS
Let’s see the stage view

Is it possible to manage the Terraform state?
Yes. You can include the terraform backend code to preserve the state file. In my example, I have the following code to store the state file safely.
On provider.tf
provider "aws" {
  region  = "us-east-2"
}

terraform {
  backend "s3" {
  bucket = "ua-terraform-state"
  key = "dev/ec2-app2/terraform.tfstate"
  region = "us-east-2"
  }
}
Test the terraform state file use case:
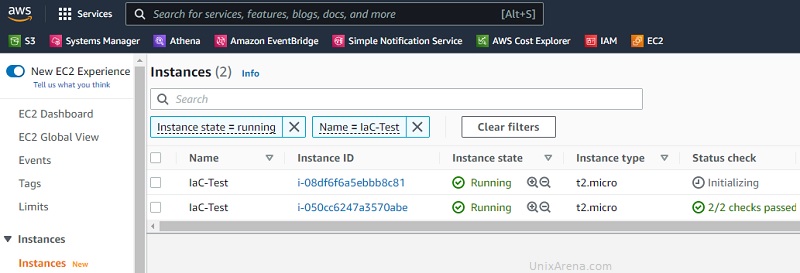
Let’s assume that you would like to provision one more instance for the same application, how can we do that using this automation pipeline? You just need to update the terraform resource code to increase the instance count from 1 to 2. No modification is required on the pipeline jobs. Even an accidental re-run will not deploy a new instance since you have the state file.
resource "aws_instance" "main" {
  ami           = "ami-001089eb624938d9f"
  instance_type = "t2.micro"
  count         = 2

  tags = {
    Name = "IaC-Test"
    Env = "dev"
  }
}
- Re-run the “dev” pipeline job and review the plan. You should be able to see that one resource will be added since already one instance is running.
Plan: 1 to add, 0 to change, 0 to destroy.
- Run the “master” job to perform “terraform apply” to increase the EC2 instance count from 1 to 2.
Conclusion:
We have successfully integrated Terraform and Jenkins using pipeline jobs. IaC (Infrastructure as Code) has been demonstrated using this platform on the AWS cloud. A similar pipeline can be leveraged for other clouds and ON-PREM (as long as terraform supports the environment). Jenkins GUI and RBAC mechanism help to secure the terraform pipeline jobs and provide access to the people who actually need it. In the end, we have seen how to manage the existing infrastructure using code and make changes safely by using terraform state management. Hope this article is informative to you.
senthilkumar says
it is good who want master in terraform