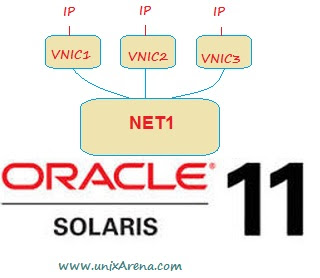
How to assign Static IP address in Solaris 11? Is it possible to assign multiple IP address to NIC ? First we will the basic difference between older version of Solaris and Solaris 11.In Solaris 10, according to the NIC manufacturer,physical network interfaces are named (Ex:bge,e1000g,nxge).But in Solaris 11 onwards,the inconsistencies names are hidden from the view and all the interfaces will be named as net0,net1…netx .
If you want to know which “netx” name has been mapped to physical interface (Ex:bge0,e1000g,nxge), you can see those information using below command.
root@Unixarena-SOL11:~# dladm show-phys
LINK              MEDIA                STATE      SPEED  DUPLEX    DEVICE
net0              Ethernet             up         1000   full      e1000g0
net1              Ethernet             up         1000   full      e1000g1
net2              Ethernet             up         1000   full      e1000g2
root@Unixarena-SOL11:~#
To show all dladm level devices,including VNIC’s & aggregation links,use the below command.
root@Unixarena-SOL11:~# dladm show-link
LINK                CLASS     MTU    STATE    OVER
net0                phys      1500   up       --
net1                phys      1500   up       --
net2                phys      1500   up       --
In Solaris 11,you can give a meaning full description(net1/oracle_VIP) to all the IP address on the system unlike Solaris 10. (e1000g1:2)
Let see how to assign IP address to the physical interface “net1″(e1000g1).
1.Plumb the IP interface
root@Unixarena-SOL11:~# dladm show-phys
LINK              MEDIA                STATE      SPEED  DUPLEX    DEVICE
net0              Ethernet             up         1000   full      e1000g0
net1              Ethernet             up         1000   full      e1000g1
net2              Ethernet             up         1000   full      e1000g2
root@Unixarena-SOL11:~#
root@Unixarena-SOL11:~# ipadm create-ip net1
2.Assign the static IP address to net1.
root@Unixarena-SOL11:~# ipadm create-addr -T static -a local=192.168.2.200/24 net1/WebIP
Note:WebIP – IP description.
3.Verify whether IP address is configured or not.
root@Unixarena-SOL11:~# ifconfig  net1
net1: flags=1000843 mtu 1500 index 7
        inet 192.168.2.200 netmask ffffff00 broadcast 192.168.2.255
        ether 0:c:29:98:1:e4
root@Unixarena-SOL11:~# ipadm
NAME              CLASS/TYPE STATE        UNDER      ADDR
lo0               loopback   ok           --         --
   lo0/v4         static     ok           --         127.0.0.1/8
   lo0/v6         static     ok           --         ::1/128
net0              ip         ok           --         --
   net0/v4        static     ok           --         192.168.2.51/24
   net0/v6        addrconf   ok           --         fe80::20c:29ff:fe98:1da/10
net1              ip         ok           --         --
   net1/WebIP     static     ok           --         192.168.2.200/24
root@Unixarena-SOL11:~#
You have successfully assigned the IP address to interface net1 (e1000g1).
Now you have a question in mind that, how to assign multiple IP address to single interface (Like Solaris 10’s – e1000g1:1,e1000g1:2…..). ? Solaris 11 has brought the new concept called VNIC. You can create N no of VNIC’s using single physical interface and possible to create on top of aggregation as well.These VNIC are treated as actual physical interface and possible to assign to local zones with full access to it.It is possible to run snoop on it.
You can also give a meaningful name to VNIC(virtual interface). Let’s see how can create a new VNIC using interface net2 (e1000g2).
1.List out the physical interface.
root@Unixarena-SOL11:~# dladm show-phys
LINK              MEDIA                STATE      SPEED  DUPLEX    DEVICE
net0              Ethernet             up         1000   full      e1000g0
net1              Ethernet             up         1000   full      e1000g1
net2              Ethernet             unknown    1000   full      e1000g2
root@Unixarena-SOL11:~#
2.Create a new VNIC using net2 (e1000g2). Here the VNIC name “UnixArena1”
root@Unixarena-SOL11:~# dladm create-vnic -l net2 UnixArena1
3.Plumb the virtual interface
root@Unixarena-SOL11:~# dladm create-vnic  -l net2 UnixArena1
root@Unixarena-SOL11:~# ipadm create-ip UnixArena1
root@Unixarena-SOL11:~# ifconfig UnixArena1
UnixArena1: flags=1000842 mtu 1500 index 8
        inet 0.0.0.0 netmask 0
        ether 2:8:20:de:13:31
root@Unixarena-SOL11:~#
4. Assign a IP address to VNIC. (Like a physical interface) and verfiy.
root@Unixarena-SOL11:~# ipadm create-addr -T static -a local=192.168.2.199/24 UnixArena1/primaryIP
root@Unixarena-SOL11:~# ifconfig UnixArena1
UnixArena1: flags=1000843 mtu 1500 index 8
        inet 192.168.2.199 netmask ffffff00 broadcast 192.168.2.255
        ether 2:8:20:de:13:31
root@Unixarena-SOL11:~# ipadm
NAME              CLASS/TYPE STATE        UNDER      ADDR
UnixArena1        ip         ok           --         --
   UnixArena1/primaryIP static ok         --         192.168.2.199/24
lo0               loopback   ok           --         --
   lo0/v4         static     ok           --         127.0.0.1/8
   lo0/v6         static     ok           --         ::1/128
net0              ip         ok           --         --
   net0/v4        static     ok           --         192.168.2.51/24
   net0/v6        addrconf   ok           --         fe80::20c:29ff:fe98:1da/10
net1              ip         ok           --         --
   net1/WebIP     static     ok           --         192.168.2.200/24
root@Unixarena-SOL11:~#
5.Let me try to run snoop on VNIC which we have create now.
root@Unixarena-SOL11:~# snoop -d UnixArena1
Using device UnixArena1 (promiscuous mode)
192.168.2.75 -> 192.168.2.255 NBT NS Query Request for CGI[1c], Success
192.168.2.75 -> 192.168.2.255 NBT NS Query Request for CGI[1c], Success
192.168.2.75 -> 192.168.2.255 NBT NS Query Request for CGI[1c], Success
192.168.2.75 -> 239.255.255.250 UDP D=1900 S=62836 LEN=141
192.168.2.75 -> 192.168.2.255 NBT NS Query Request for CGI[1c], Success
192.168.2.75 -> 192.168.2.255 NBT NS Query Request for CGI[1c], Success
192.168.2.75 -> 192.168.2.255 NBT NS Query Request for CGI[1c], Success
Unixarena-SOL11 -> 192.168.2.75 TCP D=53896 S=22 Push Ack=3118040569 Seq=1465483378 Len=116 Win=64240
Unixarena-SOL11 -> 192.168.2.75 TCP D=53896 S=22 Push Ack=3118040569 Seq=1465483494 Len=116 Win=64240
192.168.2.75 -> Unixarena-SOL11 TCP D=22 S=53896 Ack=1465483610 Seq=3118040569 Len=0 Win=16367
The same way you can create a multiple VNIC and assign a new IP address to it.Hope you got some idea about Solaris 11 networking part which is completely different from Solaris 10.
Thank you for reading this article.

Leave a Reply